How to Bring Back a Missing Quick Access Menu in Windows 11
The Quick access menu in File Explorer on Windows 11 is a convenient feature that allows users to access frequently used folders and files quickly. However, there might be instances where this menu goes missing, leaving users without easy access to their preferred locations.

If you find yourself in this situation, don’t worry; there are several steps you can take to bring back the Quick access menu in Windows 11. In this guide, we’ll delve into that. So, let’s get started!
Potential Ways To Bring Back a Missing Quick Access Menu in Windows 11
1. Unhide Quick Access in File Explorer
The most common reason for the disappearance of the Quick access menu is that it has been accidentally hidden. This could happen if you disabled Quick access or set File Explorer to open to a different location, like Apple iCloud or OneDrive. To resolve this, follow these steps:
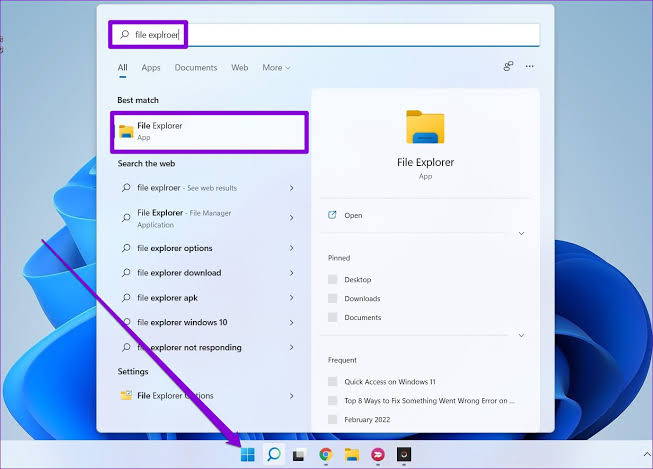
- Launch File Explorer.
- Click the “See more” (three-dot) button in the top right corner and choose “Options” from the menu.
- In the Folder Options window, select “Quick access” from the dropdown menu next to the “Open File Explorer to” section.
2. Clear File Explorer History
Sometimes, when you manage many files, the File Explorer cache might become corrupted, causing Quick access to disappear. To address this issue, you can clear the File Explorer history by following these steps:
- Launch File Explorer.
- Click the “See more” (three-dot) button in the top right corner and select “Options” from the menu.
- In the Folder Options window, select all the options under the “Privacy” section.
- Click the “Clear” button.
After clearing the history, check if Quick access is functioning properly.
3. Enable Additional Navigation Pane Options in File Explorer
Another possibility is that the Quick Access menu is not correctly configured. In this case, you can enable additional Navigation Pane options in File Explorer settings:
- Launch File Explorer.
- Click the three-dot button in the top right corner and select “Options.”
- Click the “View” tab at the top.
- Scroll down and select all the options under the “Navigation pane” section.
- Click “Apply” and then “OK.”
4. Repair System Files
If Quick access is still missing, it might be due to corruption in system files on your PC. Fortunately, you can run SFC and DISM scans to repair and replace any corrupt system files:
- Open the Start menu.
- Type “PowerShell” and click “Run as Administrator.”
- In PowerShell, enter the command “sfc /scannow” and hit Enter.
- After the SFC scan completes, follow it up with a DISM scan by running the command “DISM /Online /Cleanup-Image /RestoreHealth.”
Remember that these scans can take some time to complete, and your PC will need to restart afterward.
5. Update Windows 11
Keeping your Windows 11 PC updated is crucial for security and performance reasons. Updating Windows can also resolve issues such as a missing Quick access menu. To check for updates manually, follow these steps:
- Open the Start menu.
- Input “Windows Update” and click on it.
- Click “Check for updates” and install any available updates.
Ensure you save your work and close applications before installing updates, as your PC may restart during the process.
Final Words
If you find the Quick access menu missing, these solutions should help you restore it. By following these steps, you can once again access your frequently used files and even pin your essential items for easy access.


