How To Install Windows on Your Steam Deck
Are you a proud owner of a Steam Deck from Valve? While it comes pre-installed with SteamOS, a Linux-based operating system, you may prefer to have the versatility of a Windows-based system on your handheld gaming device.

In this guide, we will walk you through the steps on how to install Windows on your Steam Deck. This will allow you to tap into the full potential of this powerful handheld gaming device.
Things to Know Before Getting Started
Before we begin, there are a few important points to keep in mind:
1. Windows Support: Although Valve provides some drivers for the Windows on Steam Deck experience, it’s essential to note that Windows on the Steam Deck is not officially supported by Valve. If you encounter any issues, Valve’s support team may not be able to provide assistance.
2. Single Operating System: You cannot dual-boot Windows and SteamOS on your Steam Deck simultaneously. Therefore, you’ll need to decide on the operating system that best suits your needs. Remember that installing Windows requires completely erasing SteamOS, so be sure to back up any important files.
Basic Steps To Install Windows on Your Steam Deck
Now, let’s dive into the process of installing Windows 11 on your Steam Deck:
Step #1: Download Windows 11 and create a bootable USB drive
- Navigate to Microsoft’s Windows 11 downloads page.
- Select the “Create Windows 11 installation Media” option and click “Download Now.”
- Launch the Media Creation Tool and accept the terms.
- Choose the desired Edition and Language of Windows.
- Select the “USB Flash Drive” option.
- Choose your primary USB drive from the provided list.
- Allow the installer to download Windows 11 and create a bootable USB drive. This process may take up to 30 minutes.
- Once completed, disconnect the USB drive from your Windows PC.
Step #2: Download the Steam Deck Drivers to a separate USB drive
- Navigate to Valve’s website and download each of the required drivers for the Steam Deck on your PC
- These drivers include the APU driver, Wi-Fi driver, Bluetooth driver, SD card reader driver, and audio drivers 1 and 2.
- After downloading the drivers, go to your Downloads folder and highlight all six driver files.
- Press Ctrl + C to copy the selected files.
- Open a new File Explorer window.
- Navigate to “This PC” in the sidebar.
- Locate and click on your secondary USB drive.
- Press Ctrl + V to paste the copied driver files onto the USB drive.
Step #3: Boot from the USB Drive with Windows on your Steam Deck
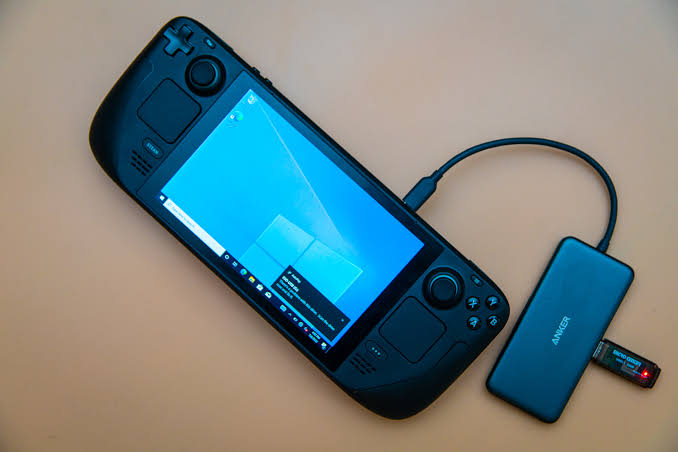
- Connect your Steam Deck to a USB hub and plug in the USB drive containing the Windows installation files. Also, connect a keyboard, mouse, and an Ethernet cable to the USB hub.
- Press and hold the volume down button and power button on your Steam Deck until the Steam boot screen appears.
- You’ll be directed to the Steam Deck Boot Manager.
- Select the USB drive with the Windows installation from the available boot options.
- The Steam Deck will reboot from the USB drive, and you’ll need to hold the device vertically to use it.
- Choose “Install Now” to proceed.
- Enter your Windows product key when prompted.
- Select the Windows Edition you have purchased.
- Next, you’ll have to agree to the terms and select “Install Windows Only.”
- Several partitions will be listed, usually with Partition 8 having the largest size.
- Select “New” to create a new partition.
- Apply the changes by selecting “Apply.”
- Choose the partition you created earlier and click “Next” to begin the installation process.
- Follow the on-screen instructions to install Windows, and if prompted, sign in with a Microsoft account.
- Once you reach the desktop, go to Settings, then Display, and change the display orientation to Landscape.
Step #4: Install the Steam Deck Drivers
- Connect your USB drive containing the previously downloaded drivers to your USB dock.
- Open the File Explorer and navigate to the USB drive.
- Highlight all six driver files and press Ctrl + C on your keyboard to copy them.
- Right-click on your desktop and create a new folder named “Steam Deck Drivers.”
- Double-click the folder to open it, then paste the copied driver files using Ctrl + V.
- Right-click on each file, select “Extract All,” and choose to extract them to the desktop.
- Repeat this process for all six zip files, extracting their respective folders to the desktop.
- Open each of the extracted folders.
- To install the APU driver, run the setup.exe file.
- For the Wi-Fi driver, run the installer.bat file.
- For the Bluetooth driver, run the installdriver.cmd file
- To install the SD card reader driver, run the setup.exe file.
- For Audio driver one, right-click on the cs35l41.inf file and select “Install.”
- For Audio driver two, right-click on the NAU88L21.inf file and select “Install.”
Final Words
Voila! You have now successfully installed Windows on your Steam Deck, transforming it into a portable Windows PC. With this new setup, you can enjoy a broader range of games and overcome limitations imposed by anti-cheat mechanisms in SteamOS. Additionally, you now have full access to the extensive Steam games library, including titles that were previously incompatible with SteamOS.
To get our latest news once they’re published, please follow us on Google News, Telegram, Facebook, and Twitter. We cover general tech news and are the first to break the latest MIUI update releases. Also, you get issues-solving “How To” posts from us.


