How To Record Zoom Meeting
Zoom is a web-based video conferencing platform featuring a desktop application and a mobile app that lets users meet online with or without video. If your Zoom account has permission, you can effortlessly record Zoom meeting. Staying organized is easier when you record a Zoom meeting. It’s almost like having a digital notebook on hand to help you when you need it because you can refer back to critical information at any time.
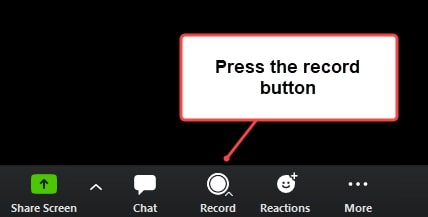
Zoom provides two recording services in the desktop app: local and cloud recordings. Local recording is available to both free and paid members, with cloud recording enabled by default for premium subscribers. There is a “Record” button at the bottom of the screen that permits you to record the meeting as long as you are a host or the host has granted you permission to do so. Meanwhile, in this guide, we will take a look at the steps on how to record a Zoom meeting. Thus, without much further ado, let’s get started;
Below Are The Steps On How To Record Zoom Meeting:
- 1. Launch Zoom and begin a meeting.
- 2. In the meeting, go to the bottom of the window’s control bar and click the “Record” button, which is the round button with a circle around it.
- 3. You’ll receive an alert that the meeting is being recorded. By pressing “Halt/Stop Recording,” you can pause or stop recording at any moment.
- 4. When the meeting is finished, it will save as an mp4 file that you can view on your computer or in your Zoom account.
- 5. Go to your meetings page to look for it.
- 6. Select “Recorded” instead of “Upcoming.” You’ll find the recording of your meeting there. The file’s title will most likely be the meeting’s date or something else, but you can alter it to something that will help you find it when you need it.


