How to root Xiaomi Redmi Note 9 Pro using Magisk
Because Android is an open-source platform is probably the reason while many users keep getting aboard. As an open-source platform, it allows OEMs to bring their ideas, which is why we have so many Android custom ROM. MIUI is Xiaomi’s in-house Android skin and runs in most of their phones except the A-series that runs stock Android outside-of-the-box.
Xiaomi is currently the fourth-largest smartphone maker globally. The company achieved this feat due to its affordable phones that offer great value for money. To make smartphones affordable for everyone, they have a sub-brand that offers feature-packed phones at an aggressive price tag.
The Redmi sub-brand is the most popular and also the most affordable Xiaomi phone line. Their most popular at the moment is the Redmi Note 9 Pro, which debuted early this year. It sports a 6.67-inch display and runs Snapdragon 720G under that hood to make things interesting for tech-savvy.
With SD 720G under the hood, installing custom ROMs and customizing the device is easy to compare to Mediatek SoC. However, to customize your Redmi Note 9 Pro to your taste, there’s every need to gain root access. The only way to gain this access is to root your device, which is why in this post, we’re discussing how to root Xiaomi Redmi Note 9 Pro using Magisk.
How to root Xiaomi Redmi Note 9 Pro using Magisk
Rooting your device comes with so many advantages, but there are also some disadvantages. While it gives you root access to customize your phone, it voids the warranty and also makes it impossible to receive updates via OTA. Luckily, you can gain root access on your Redmi Note 9 Pro without voiding the warranty, and you continue to receive OTA. That’s why we’ll be showing you how to root Xiaomi Redmi Note 9 Pro using Magisk.
Pre-requisites: You need the following tools to successfully root Xiaomi Redmi Note 9 Pro.
Unlock the device Bootloader: You can unlock your device bootloader with the help of the Mi unlock tool.
Download USB drivers – Follow this link to download
Download ADB and Fastboot tools – follow this link
Creating a Magisk patch image for rooting Redmi Note 9 Pro
- Go to settings > About phone > System update > Tap at the three dots on the top right > Click on Download latest package. It will download the current ROM package you’re using.
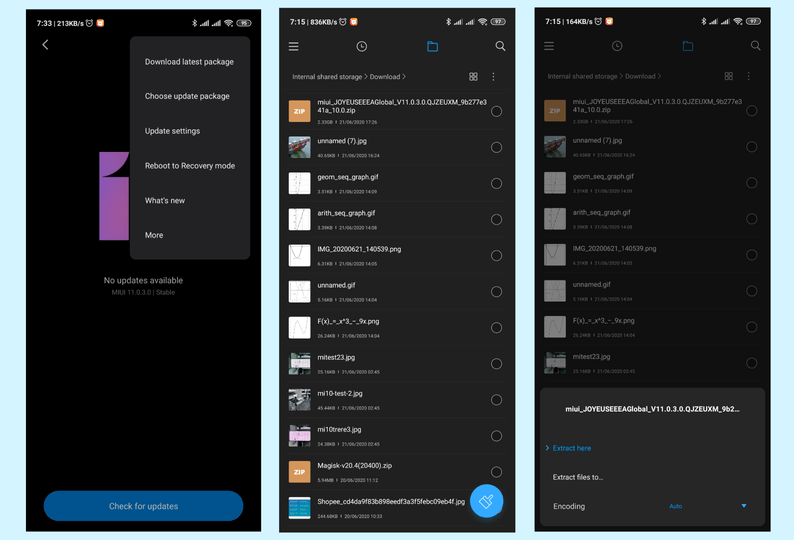
- Head over to the file manager > Download folder where the ROM is located. Extract the ROM file by choosing Extract Here.
- Launch the Magisk Manager app. It will ask you to install twice, click on install both times.
- Choose “Select and Patch a file”
- Head over to storage and select the boot.img image file you have extracted
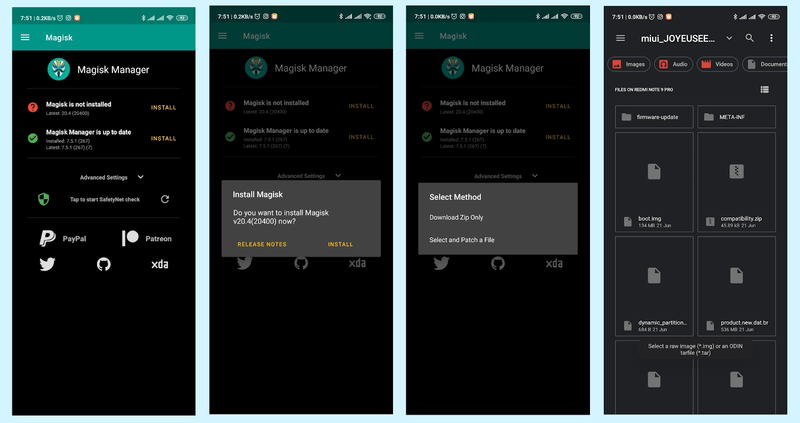
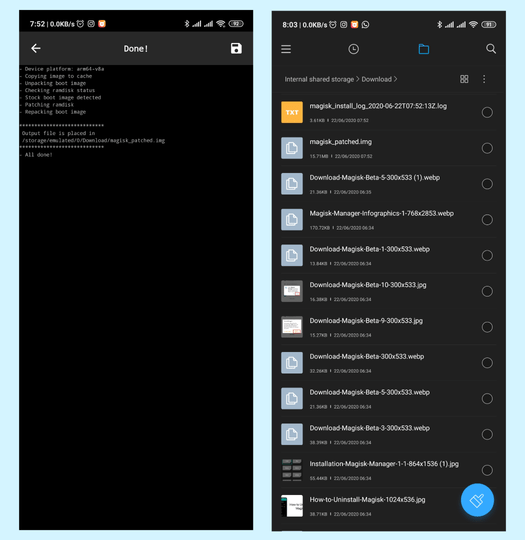
- The patching will start once you click the boot.img, and once it’s done, will display the location of the Magisk_patched.img
- Head over to File Manager > Download Folder and copy and paste to your laptop for easy access when you want to flash it later for rooting.
How to flash patched image
- Move the patched boot image to the folder where you have ADB and Fastboot tools installed on your laptop.
- Rename patched boot image to boot.img
- Reboot the device to Fastboot. Press and hold the power + volume down button
- When the device is booted into fastboot, connect it to your device to laptop using a USB cable
- Head over to the folder where you have ADB and Fastboot tools installed
- On the folder, click and hold the shift key and right-click on the keypad. Choose “Open a command window here or PowerShell window here” from the pop-up.
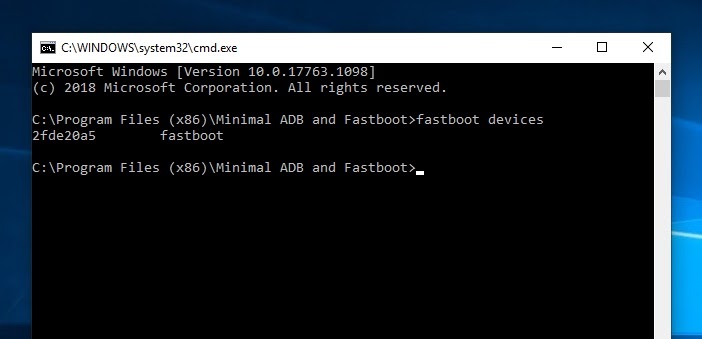
- Now to flash the patched image, we need to run the following commands;
- Excute the below command to check if the device is connected successfully
Fastboot devices
- Next is to flash the patched boot image by executing the below commands
fastboot flash boot boot.img
On completion, enter the following command to reboot
fastboot reboot
- After rebooting, launch the Magisk Manage App and click Install to update the status.
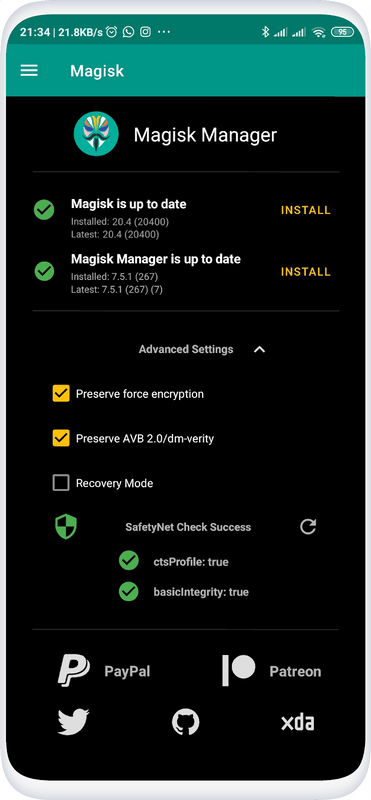
That’s all on how to root Xiaomi Redmi Note 9 Pro using Magisk, and you can use this app to check if the device is rooted. Make sure to follow the process carefully, and if you encounter any difficulty, let us via the comment section, we’ll be there to help.
